Do you want to perform software updates to your latest Raspberry Pi 3 project without dismantling its current setup? Or do you just want to access your Raspberry Pi but you don’t have a dedicated monitor and keyboard for your project? This can all be done via a protocol called SSH that is a built-in feature in all Raspberry Pi with a Raspbian OS.
As you already know, the Raspberry Pi 3, Raspberry Pi Zero and Raspberry Pi Zero W are nifty single board computers with many DIY projects and applications. Most of these projects run “headless”, which means there is no graphical display or monitor and peripheral devices connected to your Pi. Commonly, you access and administer your Raspberry Pi via VNC (Virtual Network Computing) or SSH, which are both available pre-installed in your Raspbian.
The SSH protocol (also referred to as Secure Shell) is a method for secure remote login from one computer to another. It provides several alternative options for strong authentication, and it protects the communications security and integrity with strong encryption. It is a secure alternative to the non-protected login protocols, such as rlogin and telnet, and insecure file transfer methods such as FTP.
This tutorial will guide you to access your Raspberry Pi 3 via SSH.
Step 1 – Know your Raspberry Pi’s IP address
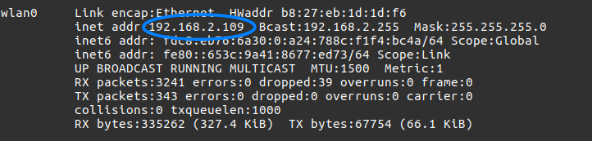
If you have access to the graphical user interface via a connected monitor to your Raspberry Pi, you can find this by typing the command below
$ ifconfiginto the terminal software.
Your Raspberry Pi’s IP address is
Special OPTION: Linux Only
In case you are already running headless at this point, you can find the IP addresses of devices connected to the same network as you by installing nmap (Linux only).
After installing nmap, type in the terminal,
$ sudo nmap -sP 192.168.2.0/24where 192.168.2.0 is your router’s IP address. This may vary depending on how many networks do you have. If somehow the command fails, try changing 192.168.2.0 to 192.168.1.0 and so on.
Your pi’s IP address is

Step 2 – Enable SSH in your Raspberry Pi
Option 1
The SSH option is “disabled” by default in your Raspberry Pi. To enable SSH, you can just create a file named ssh in the boot partition of your SD card. The content of the file does not matter. Take note that it has no suffix.
Option 2
If you have access to a graphical user interface or the terminal, you can enable it using the terminal. Type,
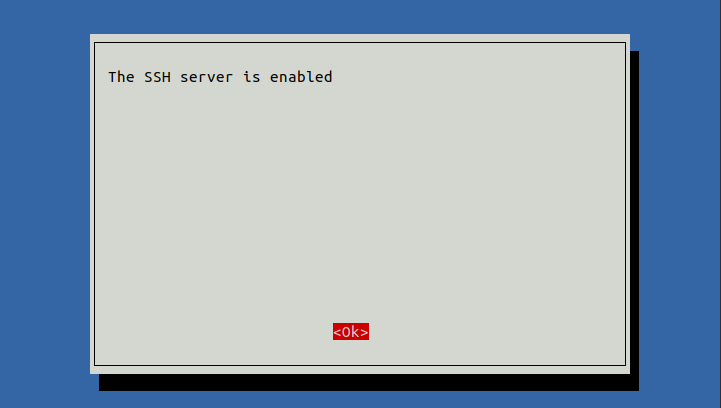
$ sudo raspi-config- Select
Interfacing Options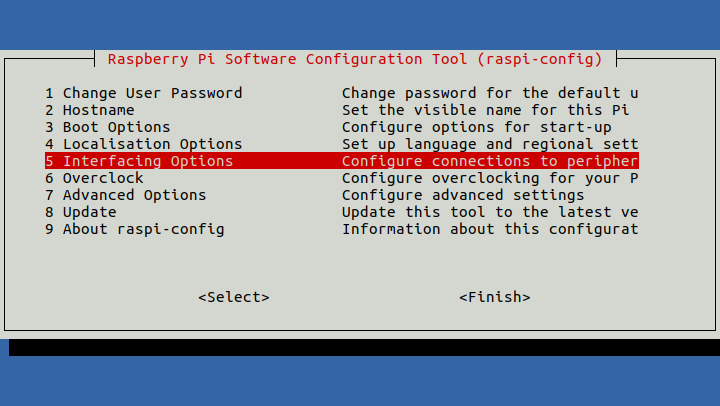
- Select
SSH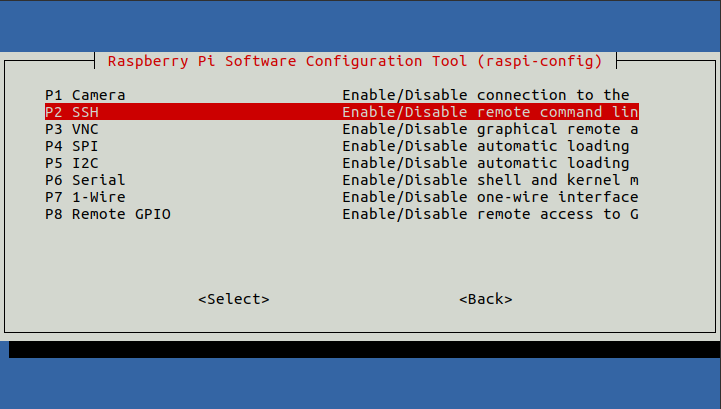
- Choose ”YES”
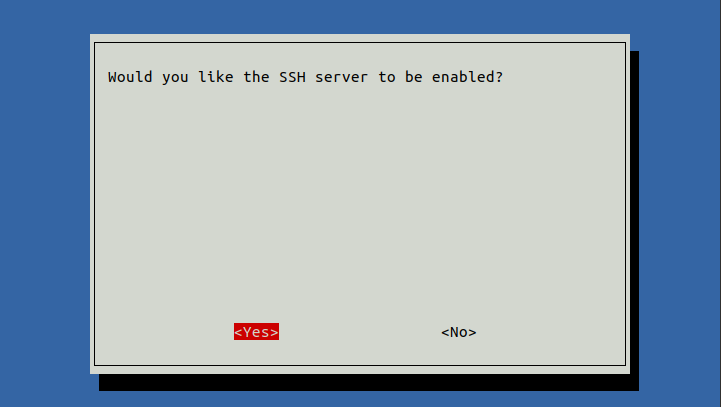
- Select ”OK”
Step 3 – Setup your Client (Mac, Linux, and Windows)
Accessing your Raspberry Pi in your PC via SSH depends on your PC’s operating system. Linux and Mac OS have SSH natively built into their system. For Windows, you have to install third-party SSH clients.
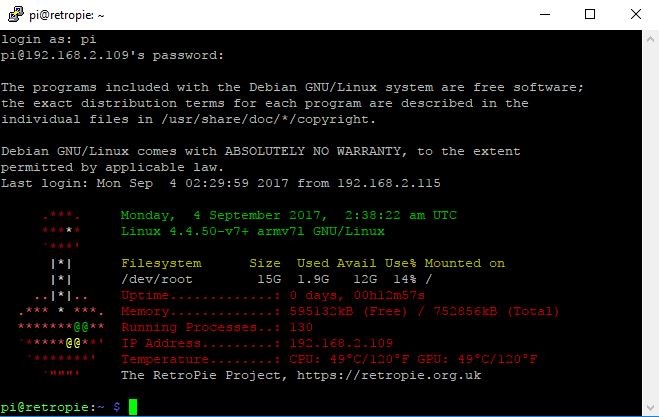
You will be prompt for a password for your Raspberry pi and the default password is “raspberry” and default user is “pi” when launched for the first time. We recommend that you change the default password.
Linux and Mac
For Linux and Mac, just type,
$ ssh pi@192.168.2.109Wherein “192.168.2.109” is the IP address of your Raspberry Pi. Just change the IP address to your own and you are now ready to login to your pi using SSH!
Windows
You will need to install a third-party SSH client in order to use SSH in Windows. In this tutorial we are going to use puTTY. You can download putty.exe for basic SSH here.
- Double-click on the putty.exe program.
- Enter necessary settings
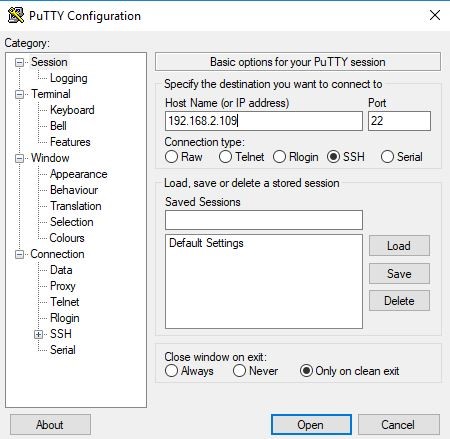
* ip address
* port
* connection type
3. Click Open to start a session.
4. Accept the connection
5. Input username and password
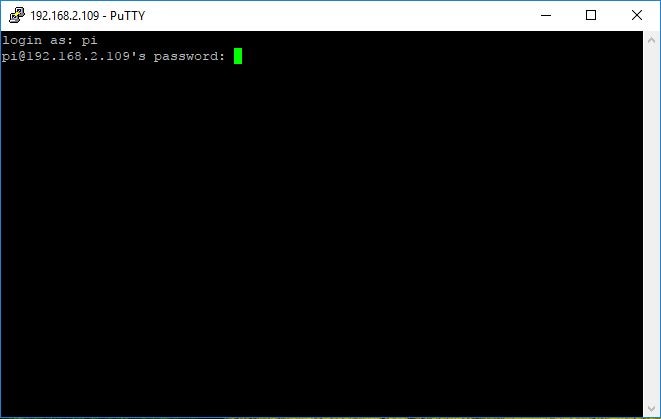
You are now using SSH in Windows!