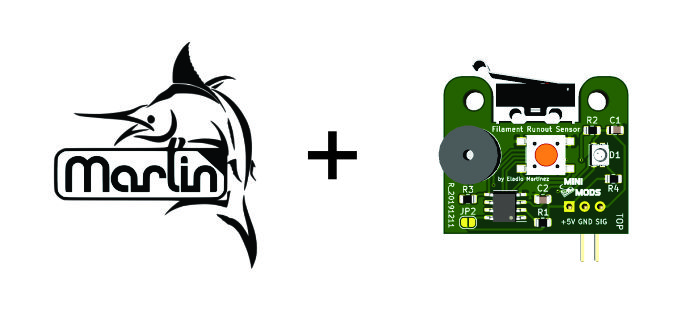
Posted on

Setup your Retroflag MEGAPi CASE with Fan Control Board

RetroFlag MEGAPi CASE Fan Control

A common modification to the RetroFlag MEGAPi CASE when running emulators is to add a fan to cool down your Pi as some emulators can stretch your board’s resources, causing it to get hot, you have probably tried simply connect the fan to the provided fan header, just to find out the fan will be constantly running whenever the power switch is pressed, there is actually a better way, by installing the mini-mods Fan Control Board you can control the fan to turn ON only when your Rasperry Pi reaches a designated temperature and turn back OFF when the system has cool down.
Continue reading Setup your Retroflag MEGAPi CASE with Fan Control Board

Posted on

Setup your Retroflag SUPERPi CASE-U with Fan Control Board

RetroFlag SUPERPi CASE Fan Control

A common modification to the RetroFlag SUPERPi CASE-U when running emulators is to add a fan to cool down your Pi as some emulators can stretch your board’s resources, causing it to get hot, you have probably tried simply connect the fan to the provided fan header, just to find out the fan will be constantly running whenever the power switch is pressed, there is actually a better way, by installing the mini-mods SUPERPi-U Fan Control Board you can control the fan to turn ON only when your Rasperry Pi reaches a designated temperature and turn back OFF when the system have cool down.
Continue reading Setup your Retroflag SUPERPi CASE-U with Fan Control Board

Posted on

Add NESPi Power Control Board to the YIKESHU Black NES Case

YIKESHU Front Control Board

In this post will cover the installation of the NESPi Power Control Board for the YIKESHU Black NES Case. The NESPi Power Control Board adds a functional Power button for safe shutdown along with a programmable Reset button functionality.

The YIKESHU NESPi CASE Package Box comes with:

  • Machine screws
  • Screwdriver
  • 5V 0.2A Fan (optional)
  • Installation Notes

Continue reading Add NESPi Power Control Board to the YIKESHU Black NES Case

Posted on

Setup the YIKESHU Black NES Case with Fan Control Board

YIKESHU Case Fan Control

In this post will cover the installation of the Fan control on the YIKESHU Black NES Case, this case includes a fan right out of the box, but simply connect the fan to the provided fan header will keep the fan constantly running whenever the power switch is pressed, there is actually a better way, by installing the mini-mods NESPi Fan Control Board you can control the fan to turn ON only when your Raspberry Pi reaches a designated temperature and turn back OFF once the system has cool down.
Continue reading Setup the YIKESHU Black NES Case with Fan Control Board

Posted on

Setup your Retroflag NESPI Case with Fan Control Board

RetroFlag NESPi CASE Fan Control

A common modification to the RetroFlag NESPi Case and the YIKESHU Black NES Case when running emulators is to add a fan to cool your Pi as some emulators can stretch your board’s resources, causing it to get hot, you have probably tried simply connect the fan to the provided fan header, just to find out the fan will be constantly running whenever the power switch is pressed, there is actually a better way, by installing the mini-mods NESPi Fan Control Board you can control the fan to turn ON only when your Rasperry Pi reaches a designated temperature and turn back OFF once the system has cool down.
Continue reading Setup your Retroflag NESPI Case with Fan Control Board

Posted on

Adding a fan to your RetroFlag Case

Now that you have finished installing your moded RetroFlag Control board,  it’s time to install a cooling fan with your Raspberry Pi setup, the script we provide to handle RetroFlag POWER and RESET Button Control and RetroFlag NESPi Fan Control have dedicated code to manage your fan, but before you plug and play your fan there are a few things to consider.
Continue reading Adding a fan to your RetroFlag Case

Posted on

How to enable your Raspberry Pi 3 and Zero W WiFi via terminal

Connecting your Raspberry Pi Boards, Raspberry Pi 3 and Raspberry Pi Zero W, to the WiFi is fairly intuitive if you have access to a graphical user interface of the various Raspian OS versions available.

However, there are some cases that you will have to work with only the terminal or even when you are in headless or SSH mode when the Raspberry pi is connected via LAN. Continue reading How to enable your Raspberry Pi 3 and Zero W WiFi via terminal

Posted on

Setup your NESPI Case with RETROFLAG Control Board

Retroflag NESPi CASE POWER and RESET Button Control and Powerboard

You now have your new NESPi CASE along with your shiny new Retrofalg Control board. Now it’s time for you to assemble and configure it along with your Raspberry Pi 3 to transform it into the mini retro gaming console.

The NESPi CASE Package Box comes with

  • Machine screws
  • Screwdriver
  • Installation guide

Continue reading Setup your NESPI Case with RETROFLAG Control Board