
You now have your new NESPi CASE along with your shiny new Retrofalg Control board. Now it’s time for you to assemble and configure it along with your Raspberry Pi 3 to transform it into the mini retro gaming console.
The NESPi CASE Package Box comes with
- Machine screws
- Screwdriver
- Installation guide
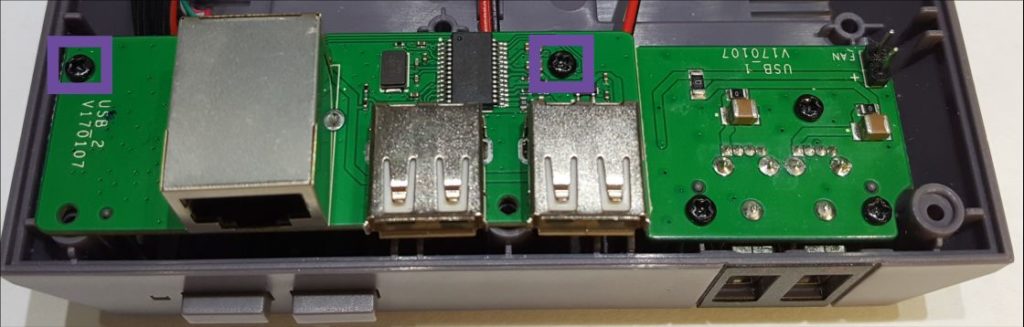
Step 1
- Separate the USB hub by removing the two screws shown on the picture.
Step 2
-
- Remove the screws holding the front panel board as well the power board, carefully detach the 1.25mm 2 pin JST power cable connected to the USB hub.

Step 3
-
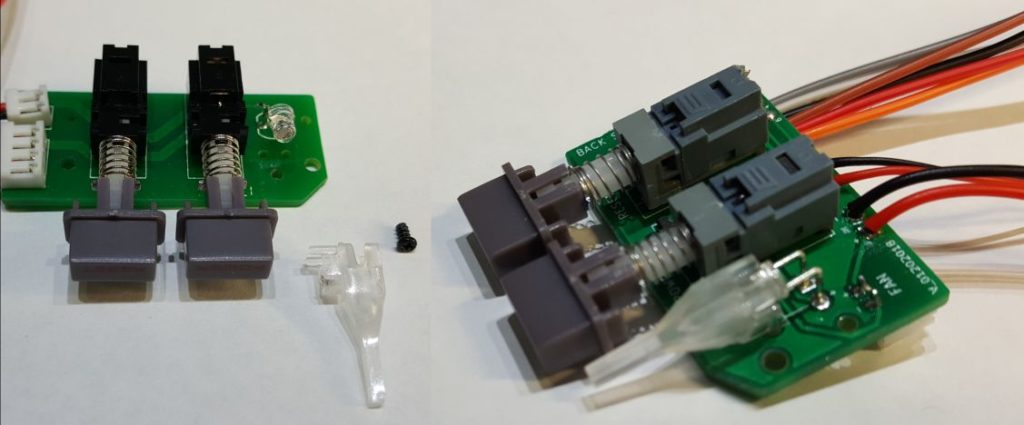
- Remove the small screw holding the LED screen and install it on the RetroFlag POWER and RESET Button Control board.
Step 4
-
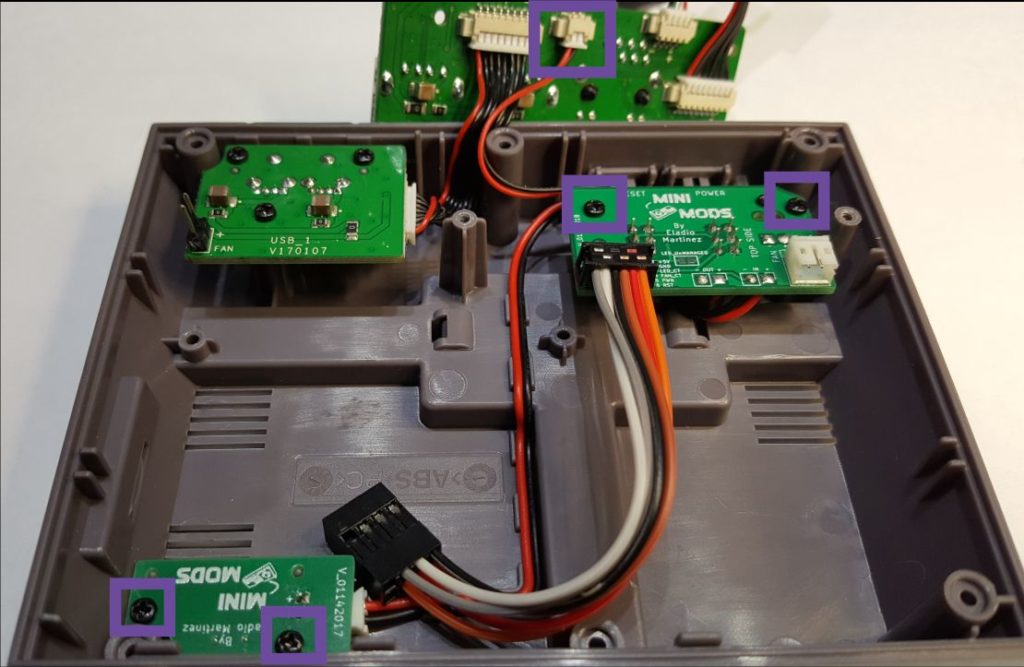
- Install the RetroFlag POWER and RESET Button Control and Power board, also connect the 1.25mm 2 pin JST power connector to the USB hub.
Step 5
-
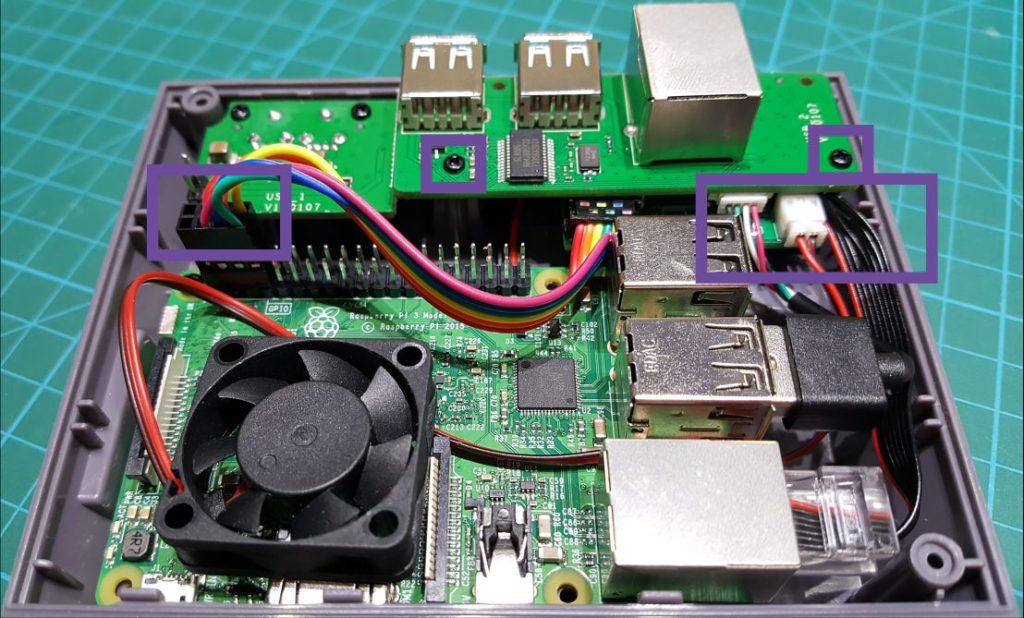
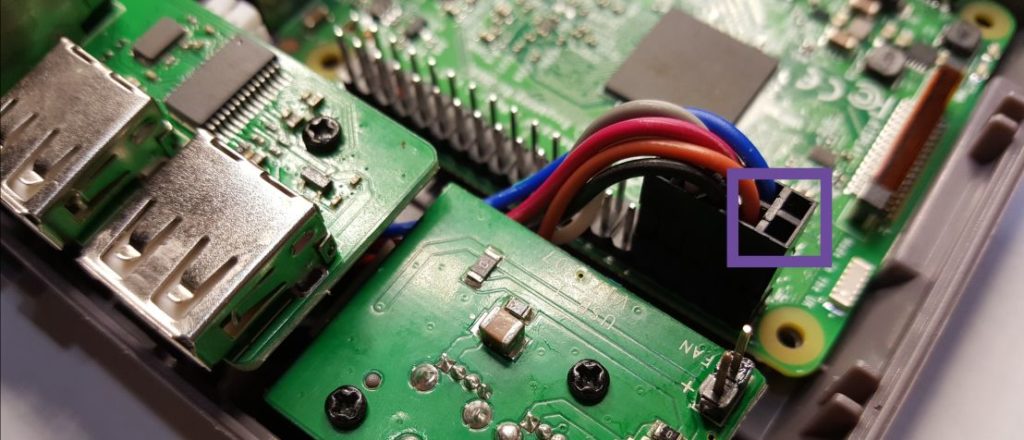
- Before reattaching the USB hub, install your Raspberry Pi and gently bend the cables on the connector as shown in the picture.

Step 6
-
-
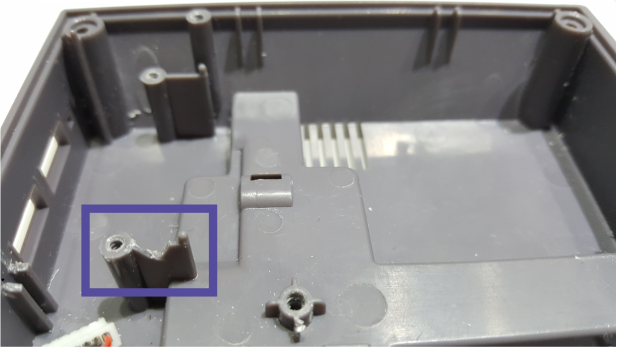
- Attach the USB hub, making sure the network cable slice next to the fan connection to avoid blocking it for easy connect and disconnect, you can find more information about configuring the fan on our blog post:
Adding a fan to your RetroFlag Case
- , also note the orientation on the 2×4 Dupont connector attache to the Raspberry Pi.
Step 7
-
- Attach the 2×4 Dupont connector to the Raspberry Pi, the orientation is very important the first row is empty.
 Warning!!!Installing the Retroflag NESPi POWER and RESET Button PCB Board on the incorrect pins on the Raspberry Pi can damage your Pi!Please use Retroflag NESPi Front Panel Control Board Hardware and Software at your own risk. We do not take responsibility for any damages to your raspberry pi that may occur.
By installing and downloading our hardware and software you are agreeing to these terms.Step 8
-
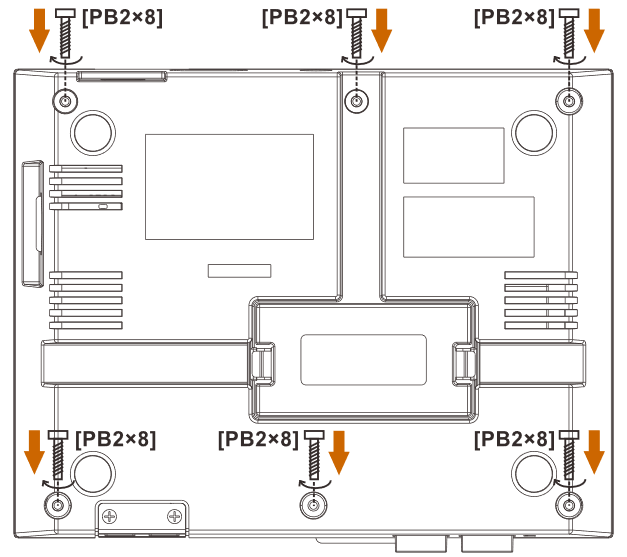
- Screw the top component of the NESPi Case to its base
Step 9
-
- Insert your Micro SD Card in your laptop, then download the image of RetroPie in https://retropie.org.uk/download/. Make sure to download the Raspberry Pi 2/3 version since you are going to install it on your Raspberry Pi 3.
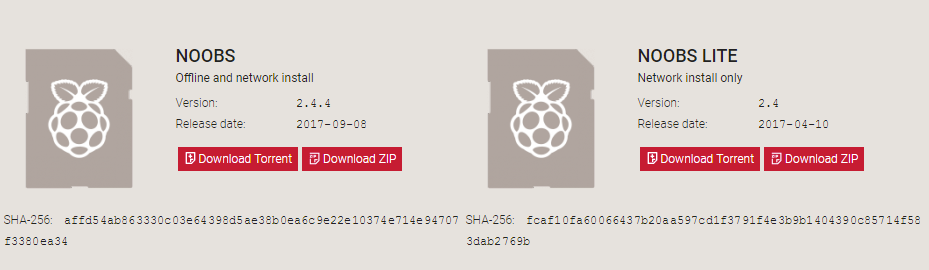
- After downloading the .gz file, extract the file using your favorite extraction tool. Remember the directory where you extracted the .img file.
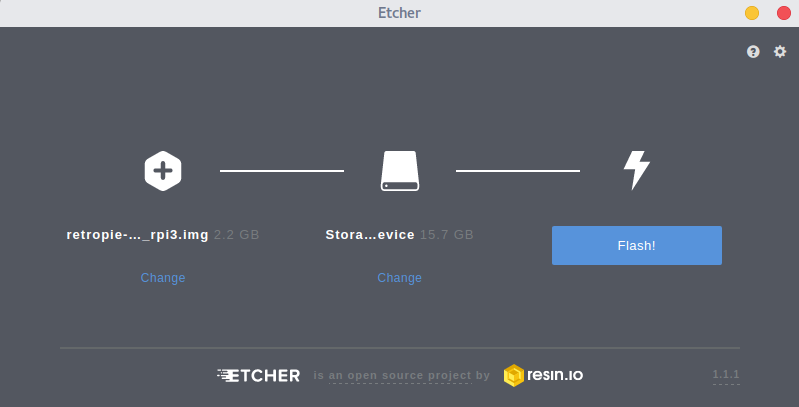
- Download the Etcher software and install. Click Select image then navigate to the extracted .img file. Click Select drive then choose the SD card. Click Flash! then wait for the process to finish.
- Insert your Micro SD Card in your laptop, then download the image of RetroPie in https://retropie.org.uk/download/. Make sure to download the Raspberry Pi 2/3 version since you are going to install it on your Raspberry Pi 3.
For more in-depth instruction of the installation and configuration of Retro Pie, refer to our blog post: Install RetroPie in your Raspberry Pi and Play your First Retro Game.
Step 10
Now that you have assembled your NESPi game console, it’s time to install and configure some files for the POWER and RESET buttons to work along with the Fan and temperature control to keep your Raspberry Pi from overheating. Fortunately, you can do this online with a one-line install using
wgetandbashin the Terminal. If you need help accessing the Raspberry terminal refer to this blog post: How to enable SSH in your Raspberry Pi 3, Raspberry Pi Zero and Raspberry Pi Zero W.1. Connect your Rasptendo console to a monitor and a keyboard before powering your Raspberry Pi.
2. Connect your Rasptendo to the internet. You may access the internet via LAN or WiFi.
3. Access the Terminal of your RetroPie by pressing F4 upon boot up.For the RetroFlag POWER and RESET Button Control Board:
In the Terminal, type the following command:wget -O - "https://github.com/mafe72/Retroflag-NESPi-Front-Panel-Control-Board/raw/master/install.sh" | sudo bashFor the RetroFlag Advance POWER and RESET Button Control Board:
In the Terminal, type the following command:wget -O - "https://github.com/mafe72/Retroflag-NESPi-Front-Panel-Control-Board/raw/master/install-adv.sh" | sudo bashThis will run a command that will automatically configure your Raspberry Pi 3 to access the Retroflag PCB Console features button and fan control. Your Raspberry Pi will automatically reboot in order for the changes to take place.
Step 11
After your Raspberry Pi has rebooted, test the Power button unlatching it the LED will turn off followed by your Raspberry Pi shutting down. You can turn on your pi by pressing the Power button again.

POWER Raspberry Pi State Action Function ON push to unlatch shutdown SLEEP/OFF push to latch wakes Pi RESET Raspberry Pi State Action Function GAMEPLAY short press game restart GAMEPLAY long press (<3 s) game quit to RetroPie dashboard If you encountered problems during the installation process, refer to more detailed instructions from our GitHub page.
-