
You now have your new NESPi CASE or NESPi CASE Plus along with your shiny new Retrofalg Pi Control v1 board. Now it’s time for you to assemble and configure it along with your Raspberry Pi 3 to transform it into the mini retro gaming console.
Step 1
-
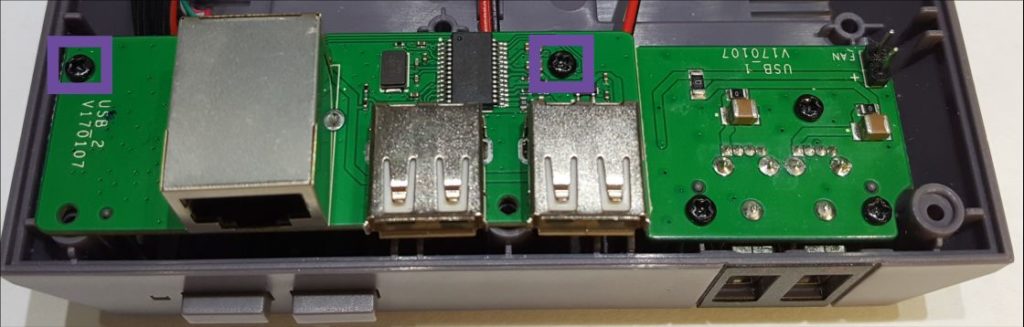
- Separate the USB hub by removing the two screws shown on the picture.
Step 2
-
- Remove the screws holding the front panel board as well the power board, carefully detach the 1.25mm 2 pin JST power cable and the 1.25mm 8 pin JST connected to the USB hub.

Step 3
-
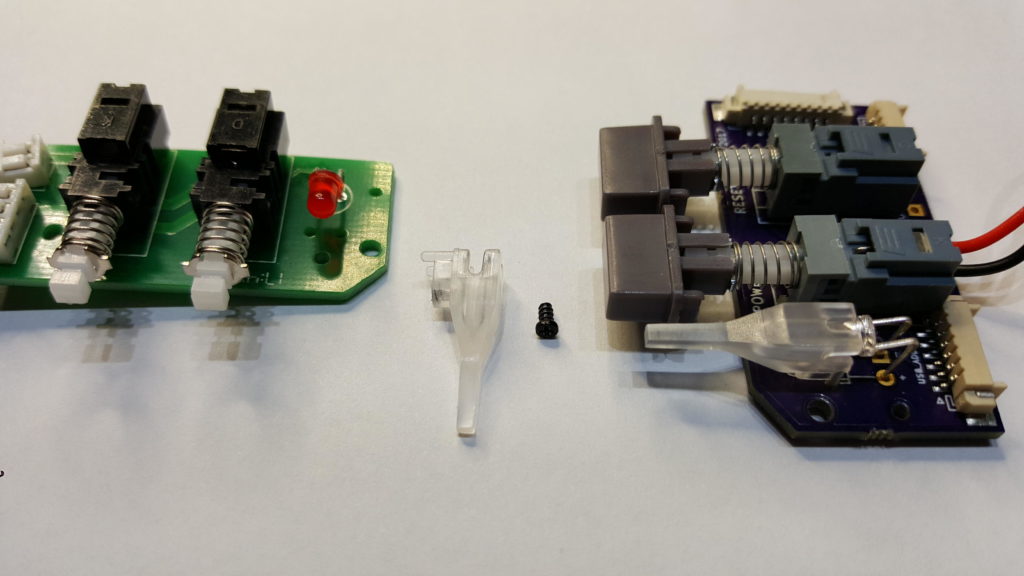
- Remove the small screw holding the LED screen and install it on the Pi Control Front Panel Button board.
Step 4
- Before you continue with the installation, your case needs to be modified to allocate the Embedded NFC Tray, this video by Evan Wright show the full process for this.
- Please refer to our thingiverse page wher you will find all the necessary STL files to build the tray https://www.thingiverse.com/thing:2781024.
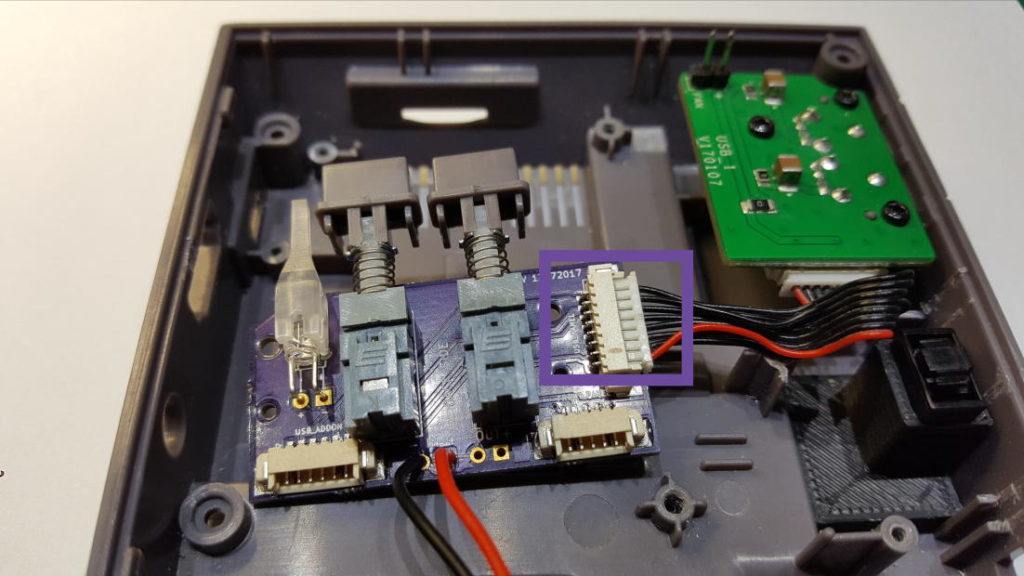
- Make sure the bottom clip of your Embedded NFC Tray is installed, then attach the front USB JST 1.25mm 8 pin connector to the Front Panel board connector labeled as USB_PANEL.
Step 5
-
- Now attach the JST 1.25 6 pin to the connector label as USB_ADDON and the JST 1.25 5 pin connector label as FRONT_PANEL to the PI Control Board v1.

Step 6
-
-
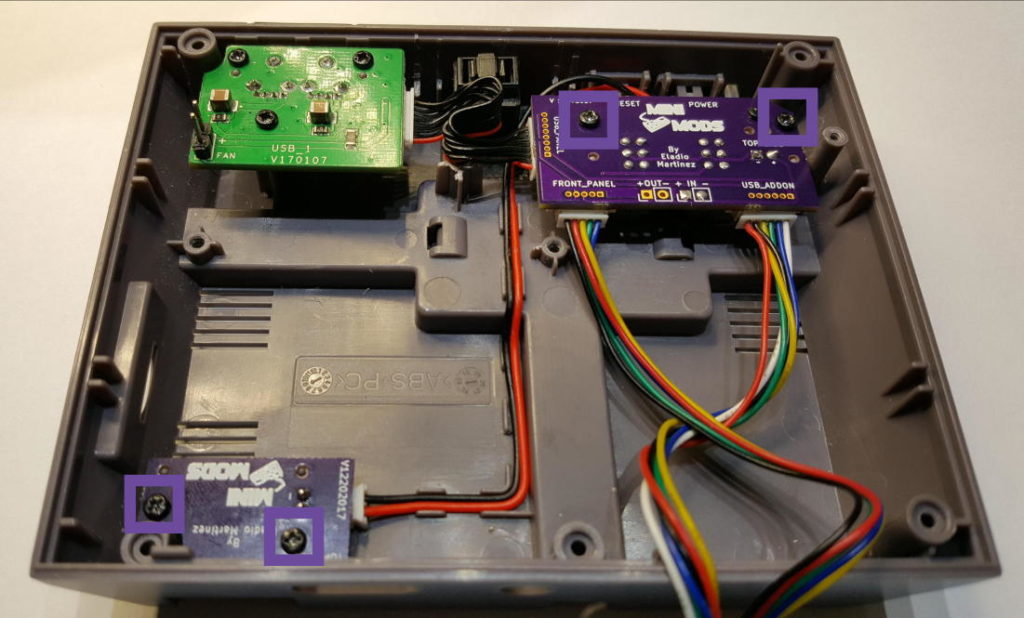
- Attache the Pi Control Front Panel board and the RetroFlag Power Board with Reverse Polarity Protection.
-
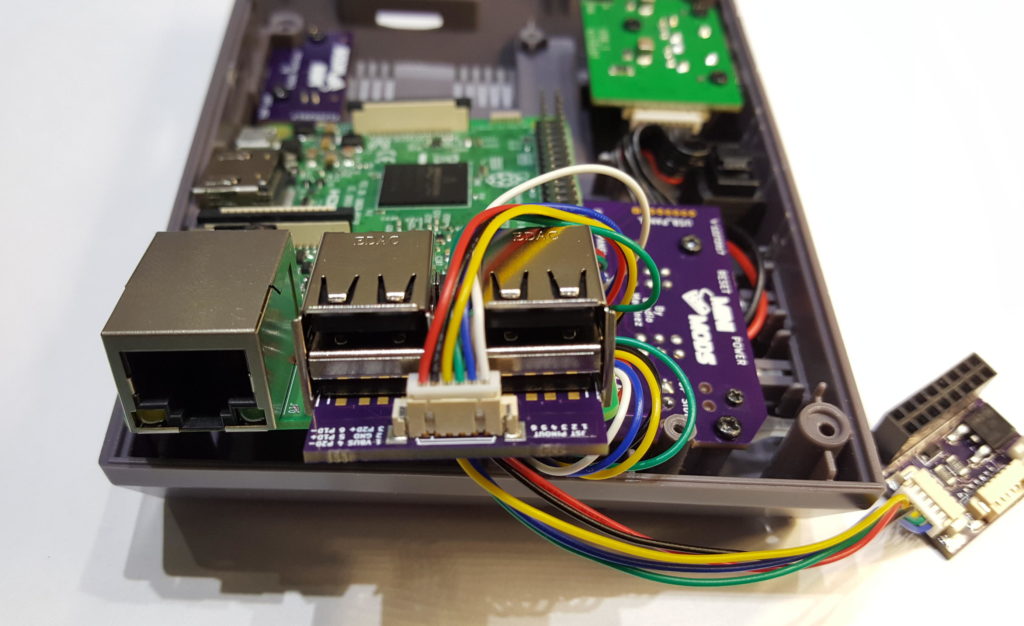
Step 7
-
- Before you install the Rasberry Pi, install the twin USB adapter to the bottom USB ports as displayed on the picture.
By installing and downloading our hardware and software you are agreeing to these terms.
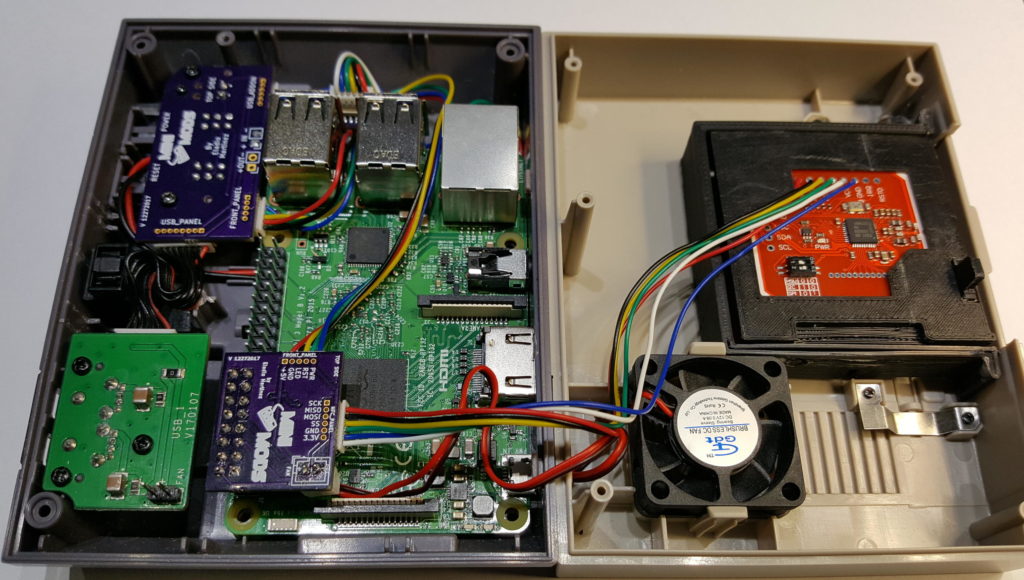
Step 8
-
-
- Now connect the Retroflag Pi Control v1 Main Board to the Raspberry Pi, make sure to install the fan and attach the NFC Reader, before installing the software.
-
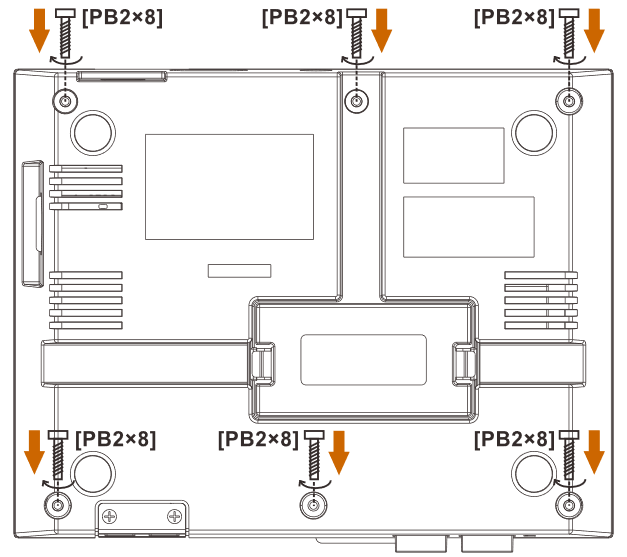
Step 9
-
- Screw the top component of the NESPi Case to its base
Step 10
Now that you have assembled your NESPi game console, it’s time to install and configure some files for the Pi Control to work along with NFC reader and the Fan and temperature control to keep your Raspberry Pi from overheating, you can do this via the Terminal. If you need help accessing the Raspberry’s terminal refer to this blog post: How to enable SSH in your Raspberry Pi 3, Raspberry Pi Zero and Raspberry Pi Zero W.
- 1. Connect your Rasptendo console to a monitor and a keyboard before powering your Raspberry Pi.
- 2. Connect your Rasptendo to the internet. You may access the internet via LAN or via WiFi.
- 3. Access the Terminal of your RetroPie by pressing F4 upon boot up.
- 4. Download and extract Pi Control archive.
wget https://github.com/mafe72/picontrol/raw/master/picontrol.tgz
tar -xzf picontrol.tgz- 5. Run installer.
cd picontrol
sudo sh ./setup.sh- 6. When prompted to reboot type “y” and hit enter.
- 7. After reboot you may now access Pi Control web app from any browser connected to same local network by typing in the IP address of the Pi.
- Example: 192.168.1.25
- Default Username: picontrol
- Default Password: password
Step 11
After your Raspberry Pi has rebooted, test the Power button unlatching it the LED will turn off followed by your Raspberry Pi shutting down. You can turn on your pi by pressing the Power button again.
The functionality of the buttons can be configured from the web interface on the settings section, here are the different button modes you can get.
Classic NES
| PI Off | PI On – Game / Es Running | PI On – Simulated Off | |
| Power Button | Press to Turn on PI (If NFC Tag found Boot to Game else Boot to ES) | Press to Exit Game / ES | Press to Load Game / ES; PI Shuts Down if idle for 30 seconds |
| Reset Button | NA | Press to Reset Game; Hold 3 seconds to Write Game to NFC Tag | NA |
PI NES
| PI Off | PI On – Game / Es Running | PI On – Simulated Off | |
| Power Button | Press to Turn on PI (If NFC Tag found Boot to Game else Boot to ES) | Press to Turn off PI | Press to Turn off PI |
| Reset Button | NA | Press to Reset Game; Hold 3 seconds to Write Game to NFC Tag | Press to Start Game from NFC Tag or last Game played |
If you encountered problems during the installation process, refer to a more detailed instruction from our GitHub page.